POV Persistence of Vision using 5 LEDs Yash Kudales Circuit Diagram Thirdly, solder the LED bulbs to the dot board strip on the other side. Step 4. Now, attach the resistors to the LED anode side. After, solder the resistors for the LED anode pins. Step 5. Now, solder the LED cathode pins together. Time for a fun-filled, easy-peasy Japan-easy to make a project! Today, we're going to show you how to make an LED POV Display. POV, an acronym for the persistence of vision, is a kind of optical illusion in which a visual image seems to persist even when the light from it ceases to enter our eyes and this makes it super cool!
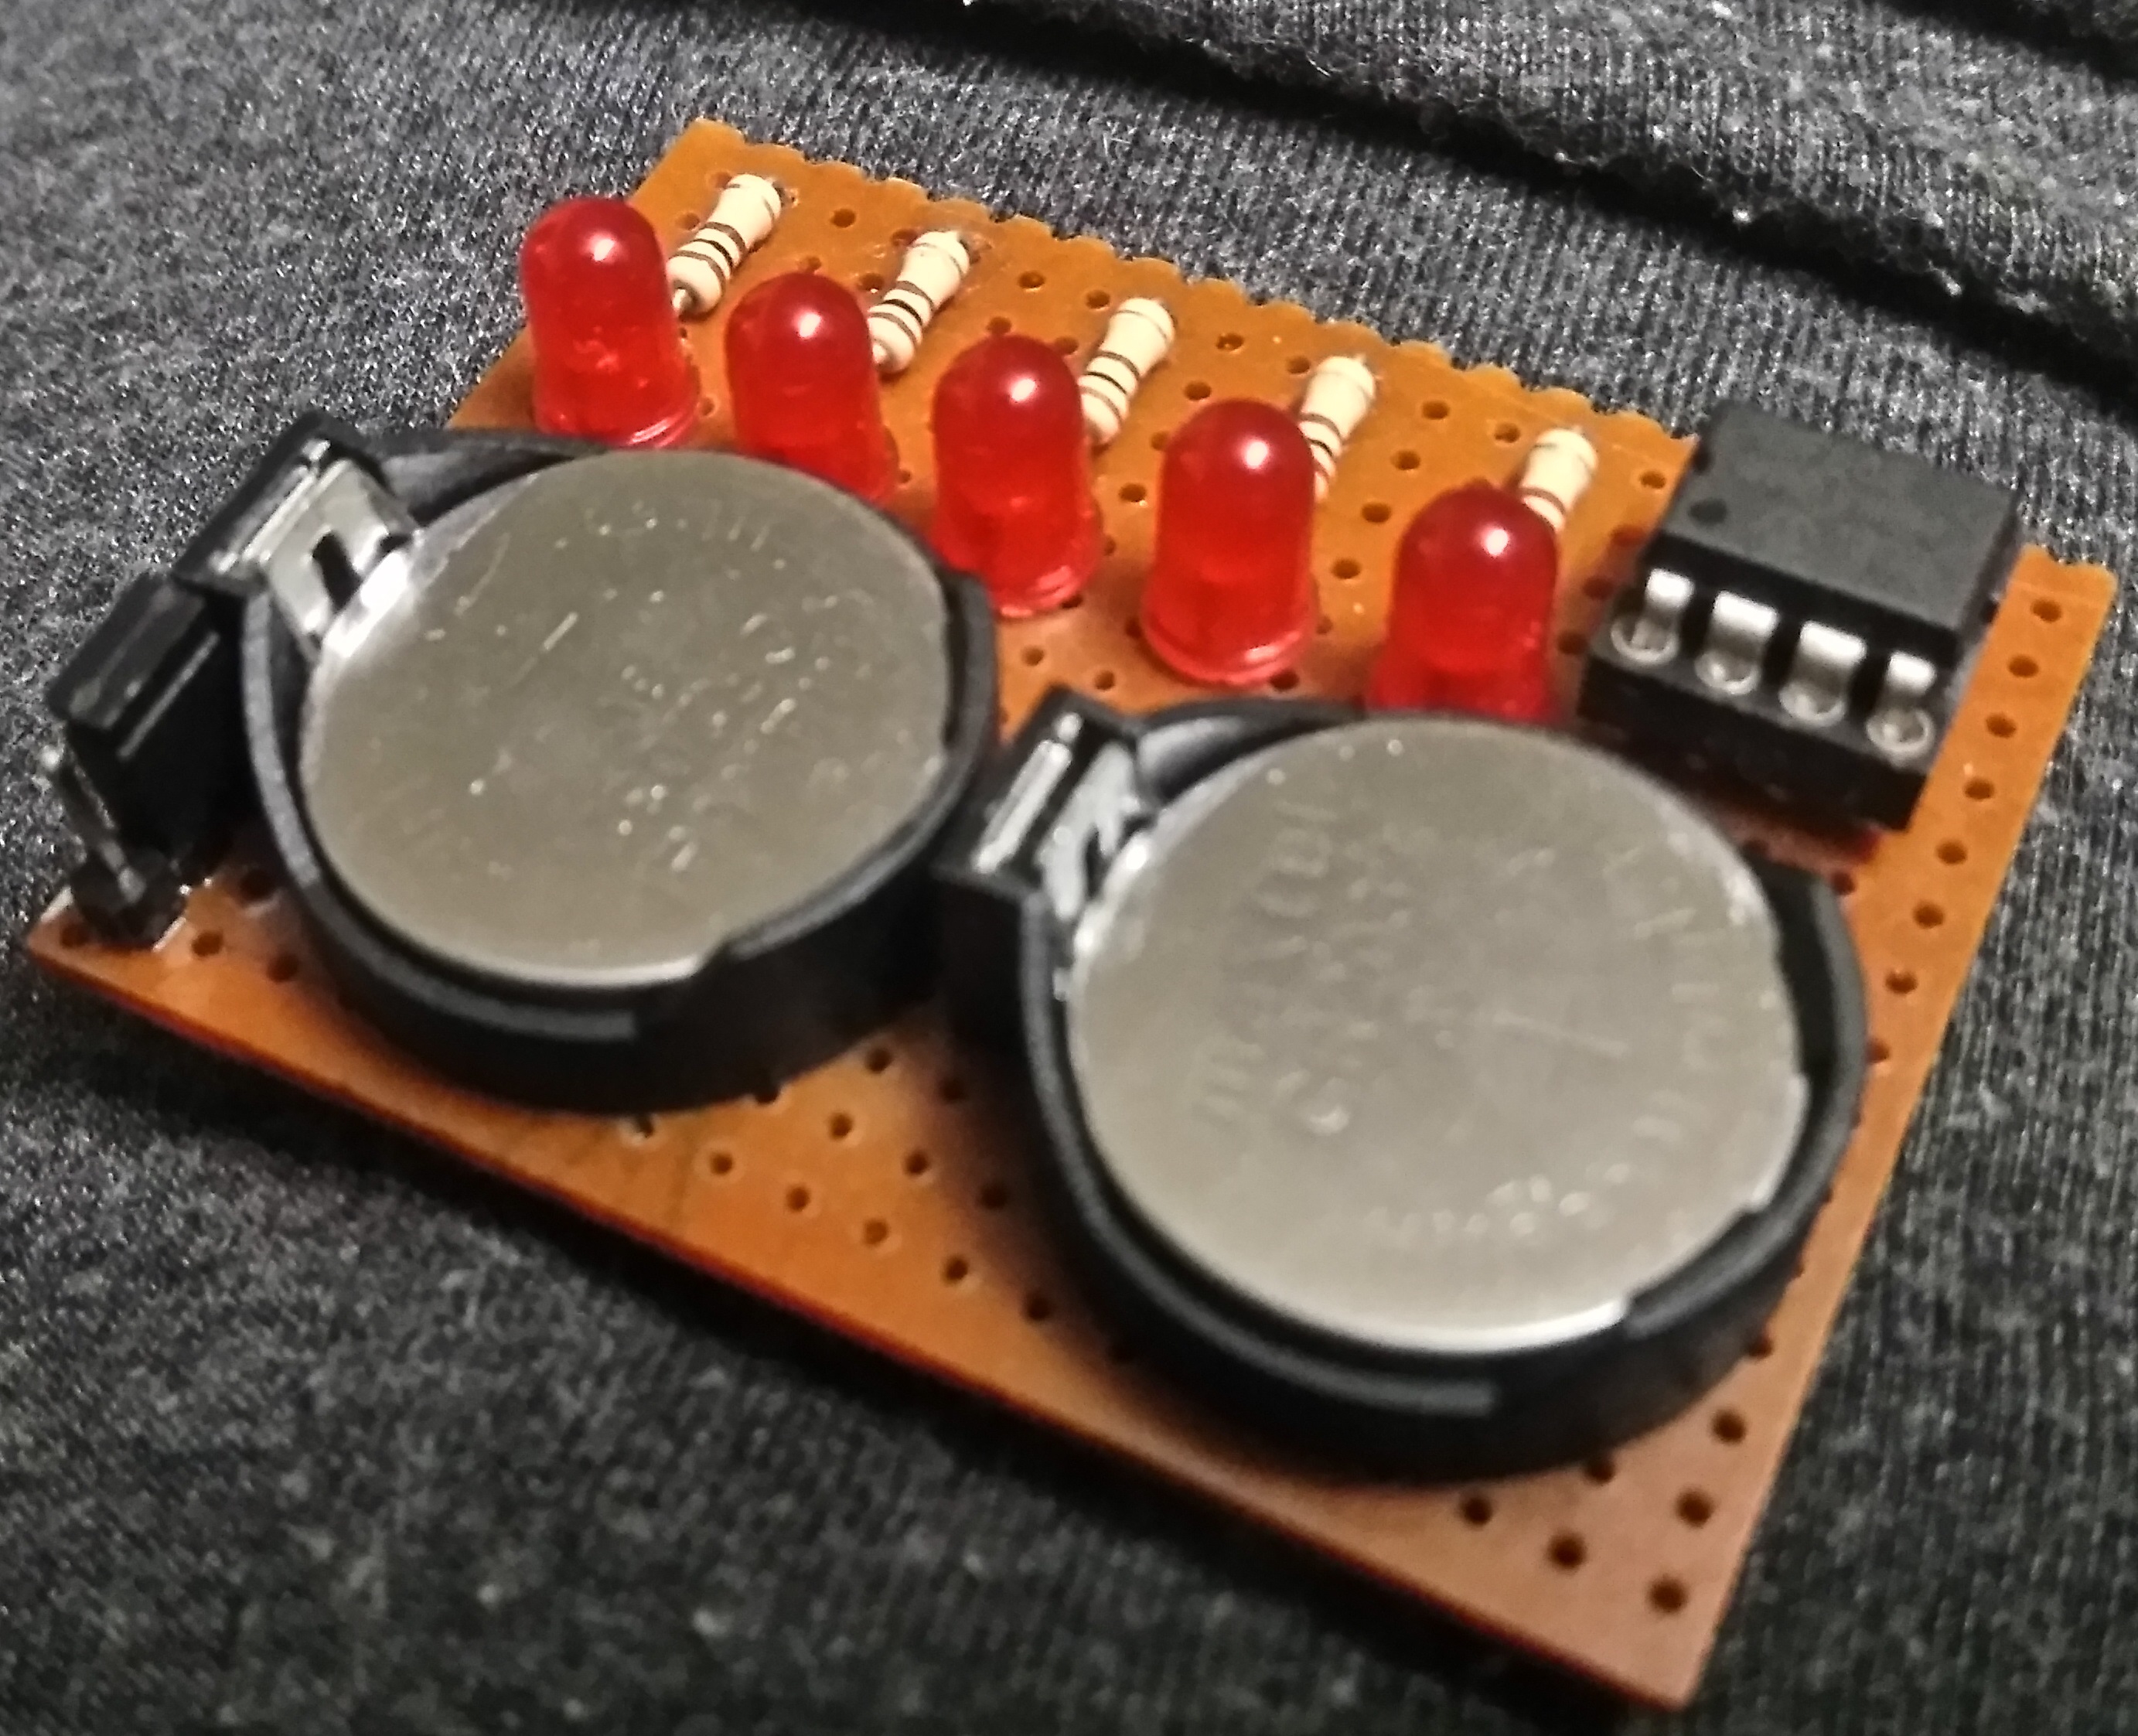
Time for a fun-filled, easy-peasy Japan-easy to make a project! Today, we're going to show you how to make an LED POV Display. POV, an acronym for the persistence of vision, is a kind of optical illusion in which a visual image seems to persist even when the light from it ceases to enter our eyes and this makes it super cool!

Huge POV Display : 11 Steps (with Pictures) Circuit Diagram
Persistence of Vision (PoV) Display Using Arduino : Time for a fun-filled, easy-peasy Japan-easy to make a project! Today, we're going to show you how to make an LED POV Display. POV, an acronym for the persistence of vision, is a kind of optical illusion in which a visual image seems to persist even…

DIY Persistence of Vision: In This Project I Will Introduce You To Perspective Of Vision Or POV Display With A Few Supplies Such As Arduino And Hall Sensors To Make A Rotating Display Which Displays Anything You Like Such As Text,Time and Other Special Characters. Step 3: Build the Circuit.
DIY Persistence of Vision : 6 Steps (with Pictures) Circuit Diagram
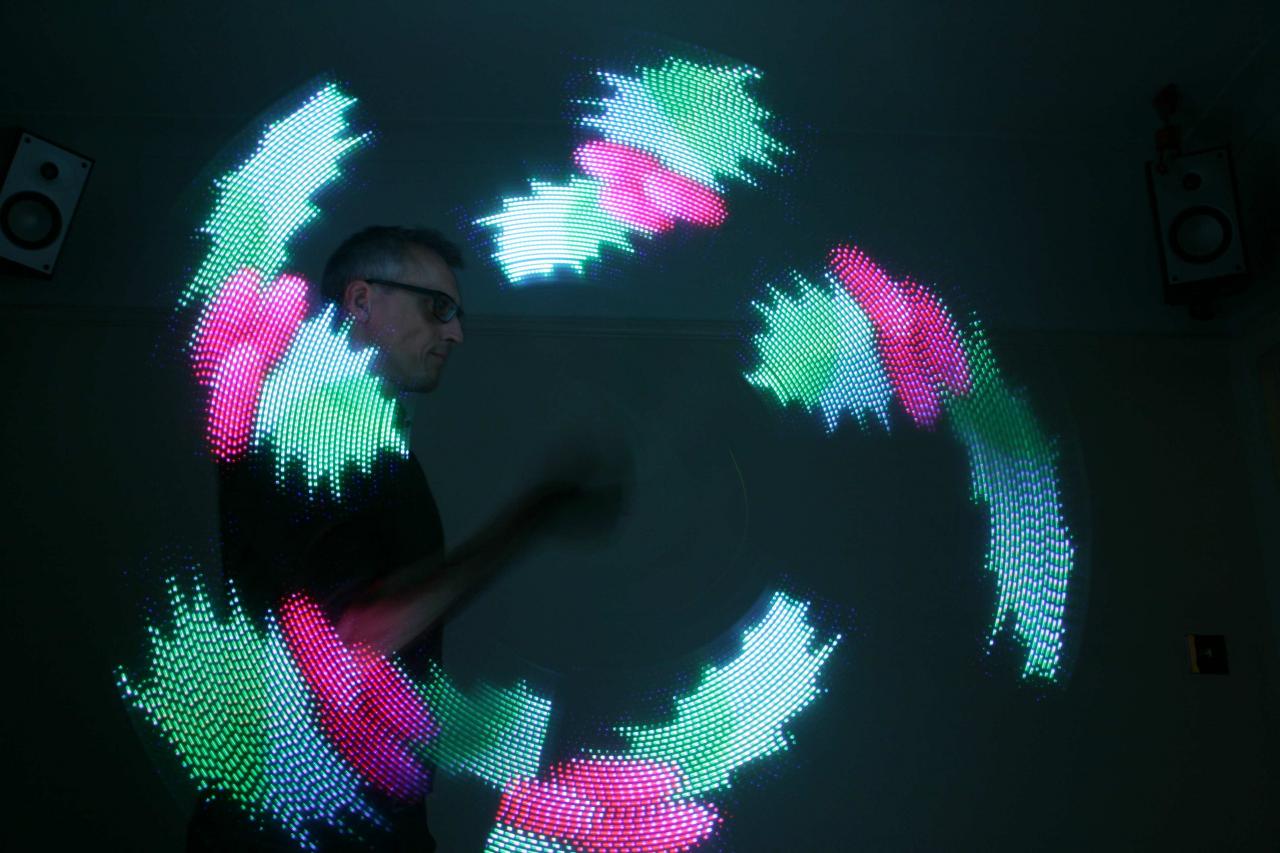
We will show you how to make a big Persistence Of Vision Display, or POV Display for short. It is basically a row of lights, LEDs in our case, which turns around very fast to show an image. Furthermore, we wanted to go big, so we made a display of 1 meter; ideal for displaying huge logo's!
